- How to rip CD to MP3 format for playback on the mobile device, in the car, and on other MP3-supporting devices.
- How to import CD to iTunes with ALAC (Apple Lossless Audio Codec) for MP4/M4A format.
- How to convert CD to FLAC format and have bit-perfect digital copies of CDs on Mac.
- How to retrieve missing metadata and album covers for ripped from CD music.
- How to trim silence at the start and end of tracks to remove redundant gaps between songs.
How to rip CD to MP3
The MP3 format is the best option for listening with a car player, smartphone, and other MP3-friendly gadgets. Most of the modern digital players support the MP3 format.
To MP3 Converter and To Audio Converter allow ripping CDs to high-quality MP3s with automatic format settings in a few easy steps:
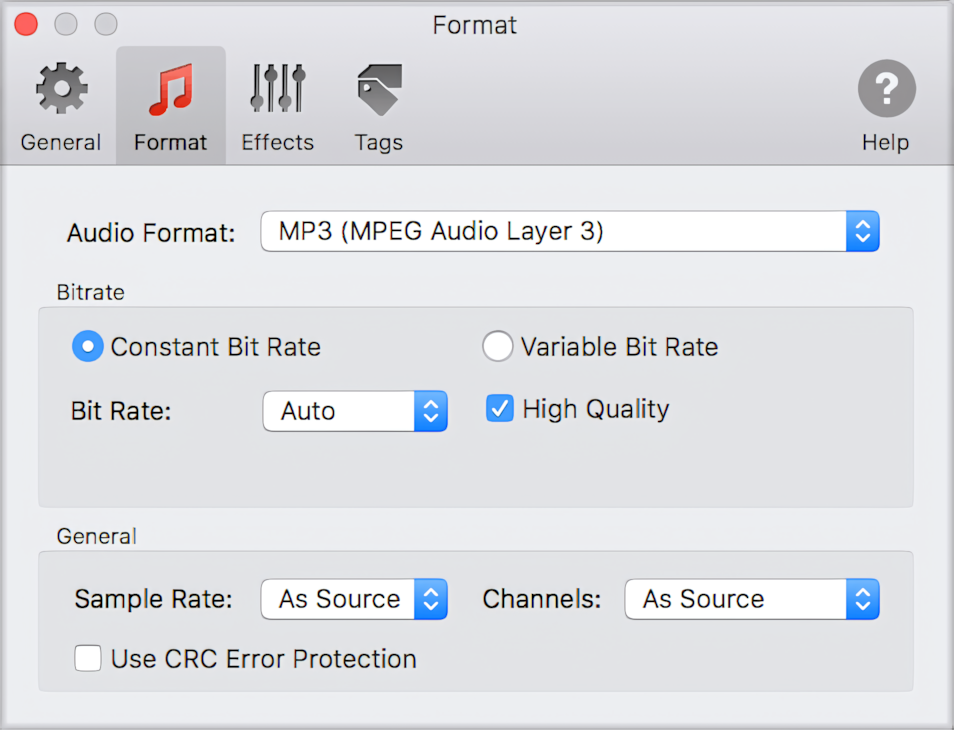
1. Open Preferences/Format window and select options as shown below:
- Audio Format: MP3 (MPEG Audio Layer 3). You don't need to choose this option in MP3 Converter.
- Bit Rate Mode: 'Constant Bit Rate.'
- Bit Rate: 'Auto' or '320' kbps.
- Quality: 'High Quality.'
- Sample Rate: 'As Source.'
- Channels: 'As Source.'
Read More: Preferences / MP3 Format >>
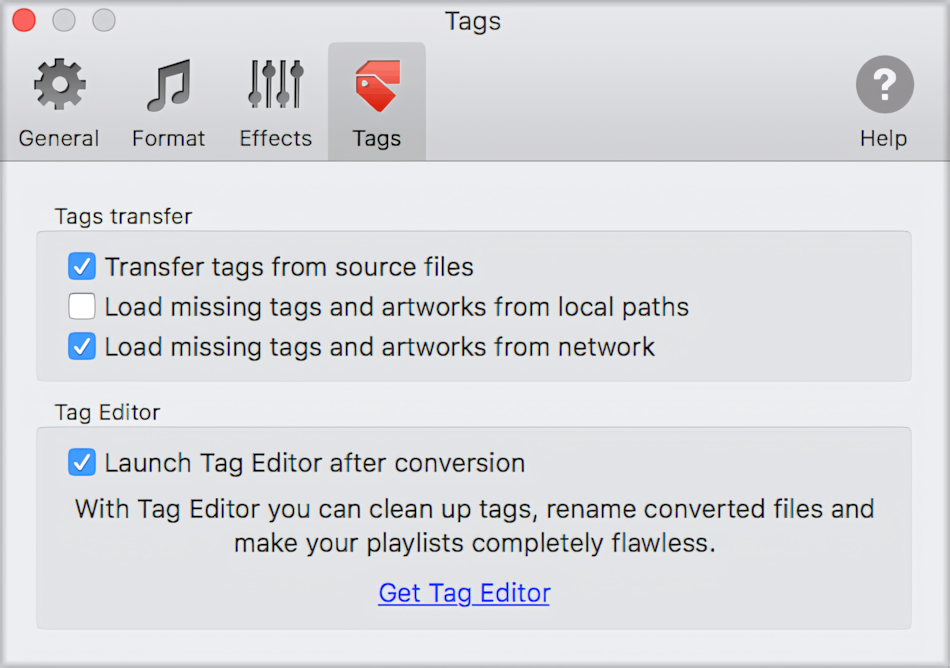
2. To embed metadata and album covers into output files, enable the option 'Load missing tags and artworks from the network', as shown below.
Read More: Preferences / Tags >>
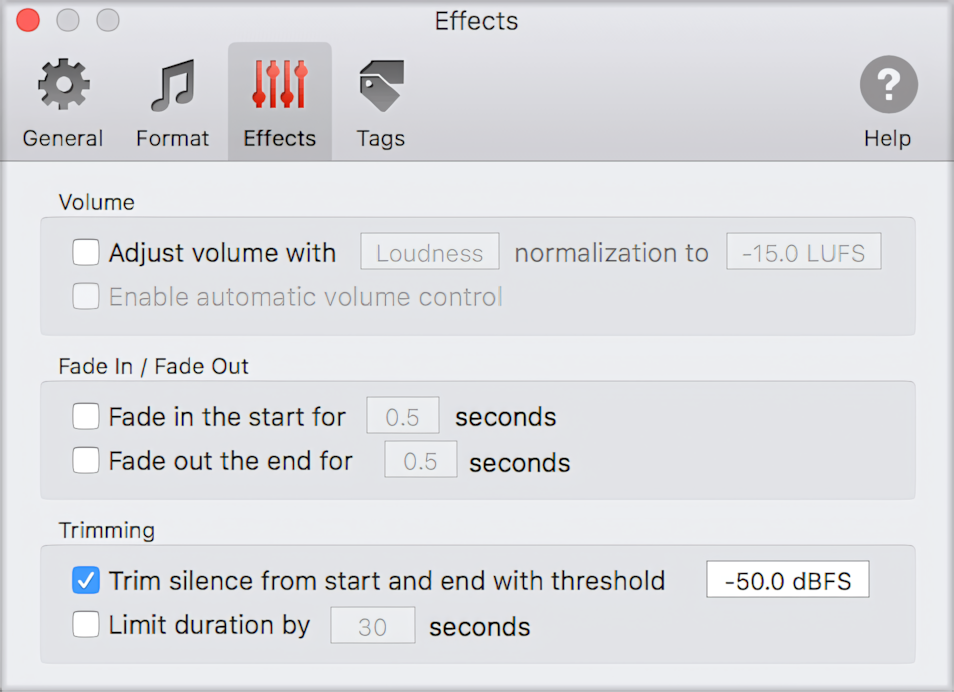
3. To remove mute gaps between songs, enable the 'Trim silence' option in the Preferences / Effects tab. Tick 'Trim silence from start and end with threshold of -50.0 dBFS as shown in the screenshot below.
Read More: Preferences / Effects >>
The steps above are most important when ripping CDs to MP3. The rest of the process remains the same: select the Destination Folder, locate CD files in Finder, and drop them into the application. Read More: How to Convert - Getting Started >>
How to import CD to iTunes
Applications related to this article, such as To Audio Converter and To M4A Converter, allow importing CDs to iTunes easily and quickly:
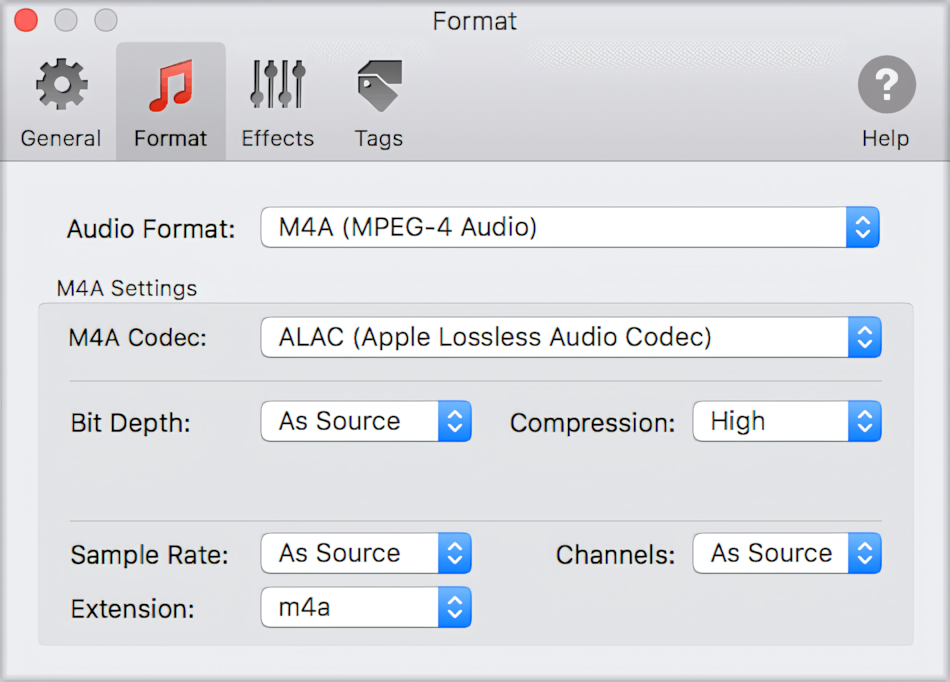
1. Open Preferences/Format window and select settings as shown below:
- Audio Format: M4A (MPEG-4 Audio)
- M4A Codec: 'ALAC (Apple Lossless Audio Codec)'. It is possible to select other codecs, such as 'AAC (Advanced Audio Coding), however, ALAC gives the best results over AAC. AAC is a good option for saving disk space when superior quality is not a top priority.
- Bit Rate Mode: 'Average.'
- Bit Rate: 'Auto.'
- Sample Rate: 'As Source.'
- Channels: 'As Source.'
- Extension: 'm4a'.
Read More: Preferences / MP4 Format
2. In Preferences/Effects, enable the option 'Trim silence from start and end with threshold' of -50.0 dBFS.
Read More: Preferences / Effects >>
3. In the Preferences / Tags window, enable 'Load missing tags and artworks from the network,' as shown below.
Read More: Preferences / Tags >>
4. Select the Destination Folder, where converted files will be stored. Read More: How to Select Destination Folder >>
5. Drag the CD from Finder into the converter's window or icon. You can also import CDs or selected songs by pressing the 'Browse' button on the converter's window. Read More: How to Convert - Getting Started >>
6. When the conversion is don,e press 'Send to iTunes' in the Progress Window. Read More: Exporting converted files to iTunes >>
How to convert CD to FLAC
The lossless FLAC format is a saver for audiophiles. Converting CD albums to FLAC ensures complete preservation of the original audio quality. At the same time, Free Lossless Audio Codec significantly compresses the size of source AIFF songs.
You can convert CD to FLAC using either To Audio Converter or To FLAC Converter for Mac. Just follow the few easy instructions listed below:
1. Open the Preferences/Format window and select options as shown below:
- Audio Format: 'FLAC (Free Lossless Audio Codec)'. You don't need to choose this option from To FLAC Converter.
- Bit Depth: 'Auto'.
- Sample Rate: 'Auto'.
- Channels: 'Auto'
- Compression: 'High', to minimize the size of output FLACs.
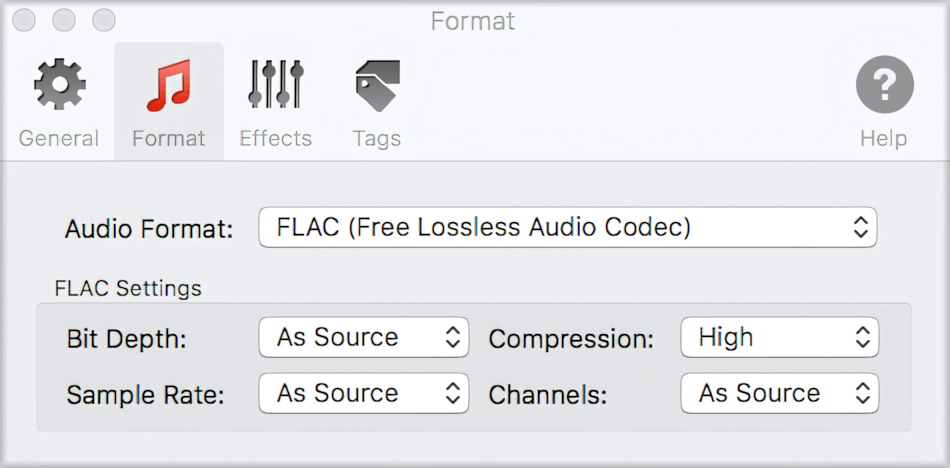
Read More: Preferences / FLAC Format >>
2. Some CDs often come with gaps at the start and end of tracks. To remove them, enable the 'Trim silence' option in the Preferences / Effects tab. Tick 'Trim silence from beginning and end with a threshold of -50.0 dBFS as shown in the screenshot:
Read More: Preferences / Effects >>
3. In the Preferences/Tags window, enable the option 'Load missing tags and artworks from the network', as shown below.
ReadMore: Preferences / Tags >>
4. The rest of the process stays as is: select the Destination Folder, find CD files in Finder, and drop them into the application. Read More: How to Convert - Getting Started >>