Reasons to split large audio files
Sometimes you encounter a music album, podcast, or audiobook that includes just a small text CUE file (CUE Sheet) and a large audio file. You can split it into separate audio tracks or files with the CUE Splitter.
There are several reasons to do this, and one of them is the difficulty in playing long audio files. Software and hardware audio players often don't support CUE Sheets and treat each large audio file as a single audio track, making it challenging to select and identify individual audio tracks.
Another reason is how to play audio files in a format that your mobile device or car player does not support.
This article introduces a CUE Splitter and provides a tutorial on how to split audio files (FLAC, MP3, APE, WAV, OGG, or WMA) associated with a CUE Sheet. With the CUE Splitter, you'll never have trouble playing audio files on your devices.
CUE Sheet
A CUE Sheet is a text file, commonly having a ".cue" extension and describing how the tracks of a music album or audiobook are laid out. The CUE Sheet contains information such as the Start Time and End Time of each audio track, Track Title, Track Number, Artist, Album, and more.
An example of a CUE Sheet:
REM GENRE "Symphonic Gothic Metal"
REM DATE 2010
REM DISCID 990BCA0B
REM COMMENT "ExactAudioCopy v0.99pb4"
PERFORMER "Tristania"
TITLE "Rubicon"
FILE "Tristania - Rubicon.flac" WAVE
  TRACK 01 AUDIO
    TITLE "Year Of The Rat"
    PERFORMER "Tristania"
    INDEX 01 00:00:00
  TRACK 02 AUDIO
    TITLE "Protection"
    PERFORMER "Tristania"
    INDEX 01 04:35:40
.............................................
.............................................
.............................................
  TRACK 11 AUDIO
    TITLE "Illumination"
    PERFORMER "Tristania"
    INDEX 01 42:05:39
Getting Started
To get started, download and install one of the converters listed below the article, which supports the CUE Splitter. The installation is straightforward.
Launch the converter and check the Preferences to ensure CUE Splitter is enabled. It is on by default.
You may also want to check other settings, such as the output format. Our converters support various output formats, including MP3, MP4 (AAC and ALAC), FLAC, AIFF, and WAV, with different codecs.
"Fade-In" and "Fade-Out" effects can be helpful when albums have no silence gaps.
You might also want to set up the destination folder, where your files will be placed.
Starting Conversion
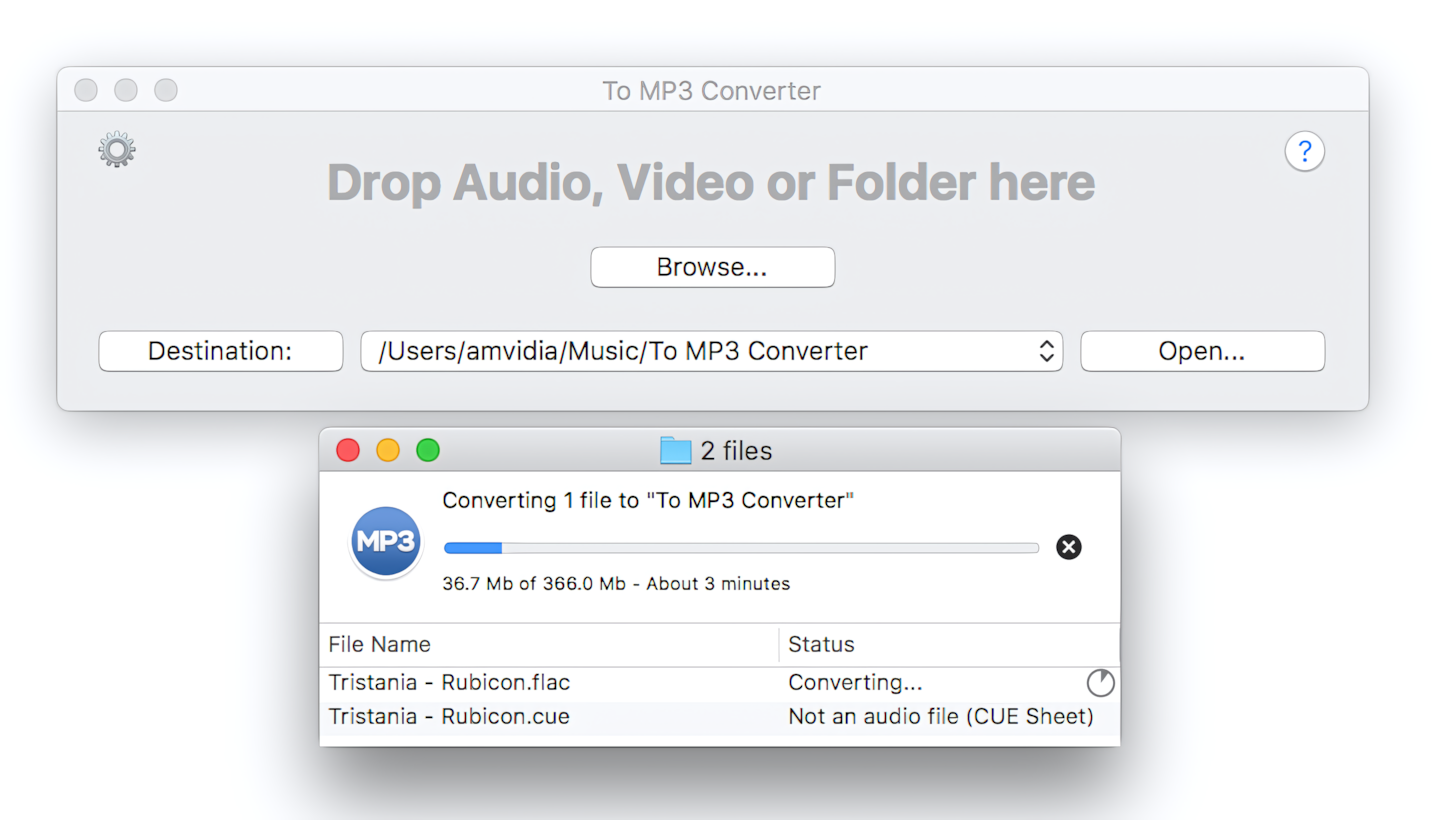
To initiate the conversion and splitting of the large audio file, drop the CUE Sheet, the file with the ".cue" extension, into the main window.
You may also want to delete the entire folder containing the CUE Sheet and source audio file. It is the preferred method for providing rights to converters and allowing them to select the necessary artworks.
Please note that converters support the conversion of a single large audio file without splitting it into multiple files. To achieve this, drop the single audio file. In the case of batch conversion, please disable "CUE Splitter" in the Preferences/General window.

The Main Window and Progress windows. Process of converting and splitting FLAC files.
The converter supports true batch conversion, allowing as many simultaneous sessions as you want to be started. Don't wait when the previous conversion is finished. Drop in the converter as many files and folders as you need and when you need them.
Read More: Starting Conversion >>
Read More: Conversion Process >>
For troubleshooting, please verify that the CUE Sheet contains the correct paths to the source audio and restart the conversion. As a CUE Sheet is a text file, it can be easily changed in the standard TextEdit application.
Tags Transfer
Converters support the complete transfer of tags from source audio and CUE Sheets to output files. Tags missing in the source audio and CUE Sheet can be picked up from file or folder names or loaded from online databases, if specified in the Preferences/Tags window.
Post conversion tasks
At the end of the conversion, you will find a folder with the artist's name and album title in the destination folder. You can access the output audio files in Finder, export them to iTunes, or open them in Tag Editor directly from the converter.
Read More: How to access converted files in Finder >>
Read More: How to export converted files to iTunes >>
Read More: How to open converted files in Tag Editor >>
